Add user authentication endpoint to authenticate your API.
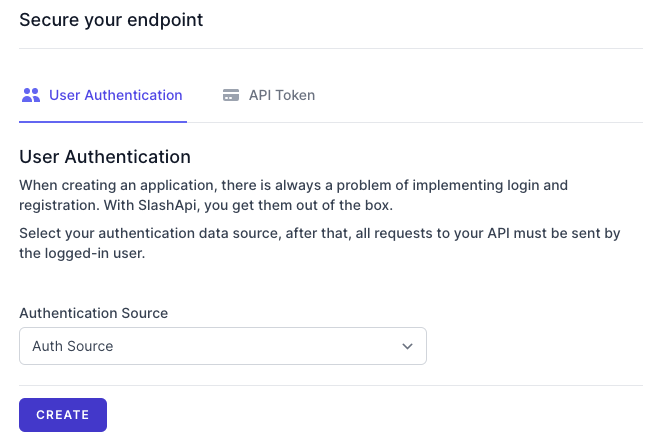
When creating an application, there is always a problem of implementing login and registration. With SlashApi, you get them out of the box.
After you create an account and log in to the dashboard, choose Authentication API on the collections page. You just need fill the name of your Authentication source in the creation form.
After you create the Authentication API, select the API that you want to add authentication with this data source and choose the "Secure Endpoint" icon.
To register a user you just need to send the data to the register endpoint.
{
    "data": {
        "email": "test@domain.com",
        "password": "12345678",
        "permissions": ["*"],
        "custom_attributes": {
            "internal_id": 1
        }
    }
}
{
    "data": {
        "email": "test@domain.com",
        "permissions": [
            "*"
        ],
        "custom_attributes": {
            "internal_id": 1
        },
        "created_at": "2021-07-30T17:17:51.000000Z",
        "updated_at": "2021-07-30T17:17:51.000000Z"
    }
}
{
    "message": "The given data was invalid.",
    "errors": {
        "data.email": [
            "The data.email must be a valid email address."
        ]
    }
}
You can also assign specific permissions to limit which areas of your API that a user may be used to access. See the list of available permissions that you can assign to your user.
Login a user
{
    "email": "test@domain.com",
    "password": "12345678"
}
{
    "data": {
        "email": "test@domain.com",
        "custom_attributes": null,
        "created_at": "2021-07-29T17:32:12.000000Z",
        "token": "13|rg7NO74HJJX1RboQTVHZvHsuyehvYawTUqELcVff"
    }
}
{
    "message": "The given data was invalid.",
    "errors": {
        "email": [
            "The provided credentials are incorrect."
        ]
    }
}
By default the token generated from the Login endpoint will never expired, to revoke the token you need to call the Logout endpoint.
To send request to the Logout endpoint, you must include Authorization header with Beared followed with generated token from the Login endpoint.
{
    "message": "User logged out"
}
{
    "message": "Invalid token"
}
Update user data.
{
    "data": {
        "email": "test@domain.com",
        "password": "12345678",
        "permissions": ["*"],
        "custom_attributes": {
            "internal_id": 1
        }
    }
}
{
    "data": {
        "email": "test@domain.com",
        "permissions": [
            "*"
        ],
        "custom_attributes": {
            "internal_id": 1
        },
        "created_at": "2021-07-30T17:17:51.000000Z",
        "updated_at": "2021-07-30T17:18:51.000000Z"
    }
}
{
    "message": "The given data was invalid.",
    "errors": {
        "data.email": [
            "The data.email must be a valid email address."
        ]
    }
}
Delete user.
{
    "message": "User deleted"
}
{
    "message": "You don't have permission to access this data."
}